Before I jump into scheduling your delivery, let me take a quick moment to give you a pro tip on locating your orders that might need to be scheduled for delivery.
Pro- Tip: My Order Page
Time to track down those orders! Head over to the Order Report—your mission control for all things scheduling!

Simply select your name as the sales person.

Now you are looking at all of your orders.

My Orders Page
Just select the schedule delivery category, and now you are looking at all of your orders that still need to be scheduled for delivery.

Of course, you can use these additional filters at the top to narrow it down further, FYI.

Items Ready Column
Notice in the items ready column, that the number of items in stock and the total number of items on the order are reflected here.

If you wait for items to arrive, they will be highlighted in red.

The orders indicated in green are all in stock and ready to be scheduled.

Order No Column
Let's go ahead and choose one of these to demonstrate the details of setting up that delivery in the system.

You can access the order by selecting straight from here, then reach out to your customer to set up delivery!

Great! We've arrived at the order—let’s dive in and see what’s next!

From Your Order
LOCAL DELIVERY + INSTALL
Let's start with the local delivery + install option first! You can always tell this is the fulfillment type chosen by the icons on the far left. The truck means delivery and the wrench means install!

Notice that on each of the line items, to the right of your model number, is the reserved stock icon.

The number in the blue circle below the icon indicates the number of items that are currently reserved.

To schedule this item for delivery, simply select the reserved stock icon.

The delivery pop-up box will appear.

Auto-scheduling On
The first thing to notice is that if you have your auto-scheduler activated on the page before, like this.

You have the option to send a link directly to your customer via SMS,

just simply by clicking the button here.

Scheduling by the customer itself
This is the page your customer will see! They can select a date from the calendar and click 'Continue',

to access the delivery tracking report, follow this link. This applies to the local delivery only option as well! However, if the delivery date is chosen by the user or sales person, the link will be send too the email one hour before the scheduled delivery.
Let's go back to the delivery pop-up box!
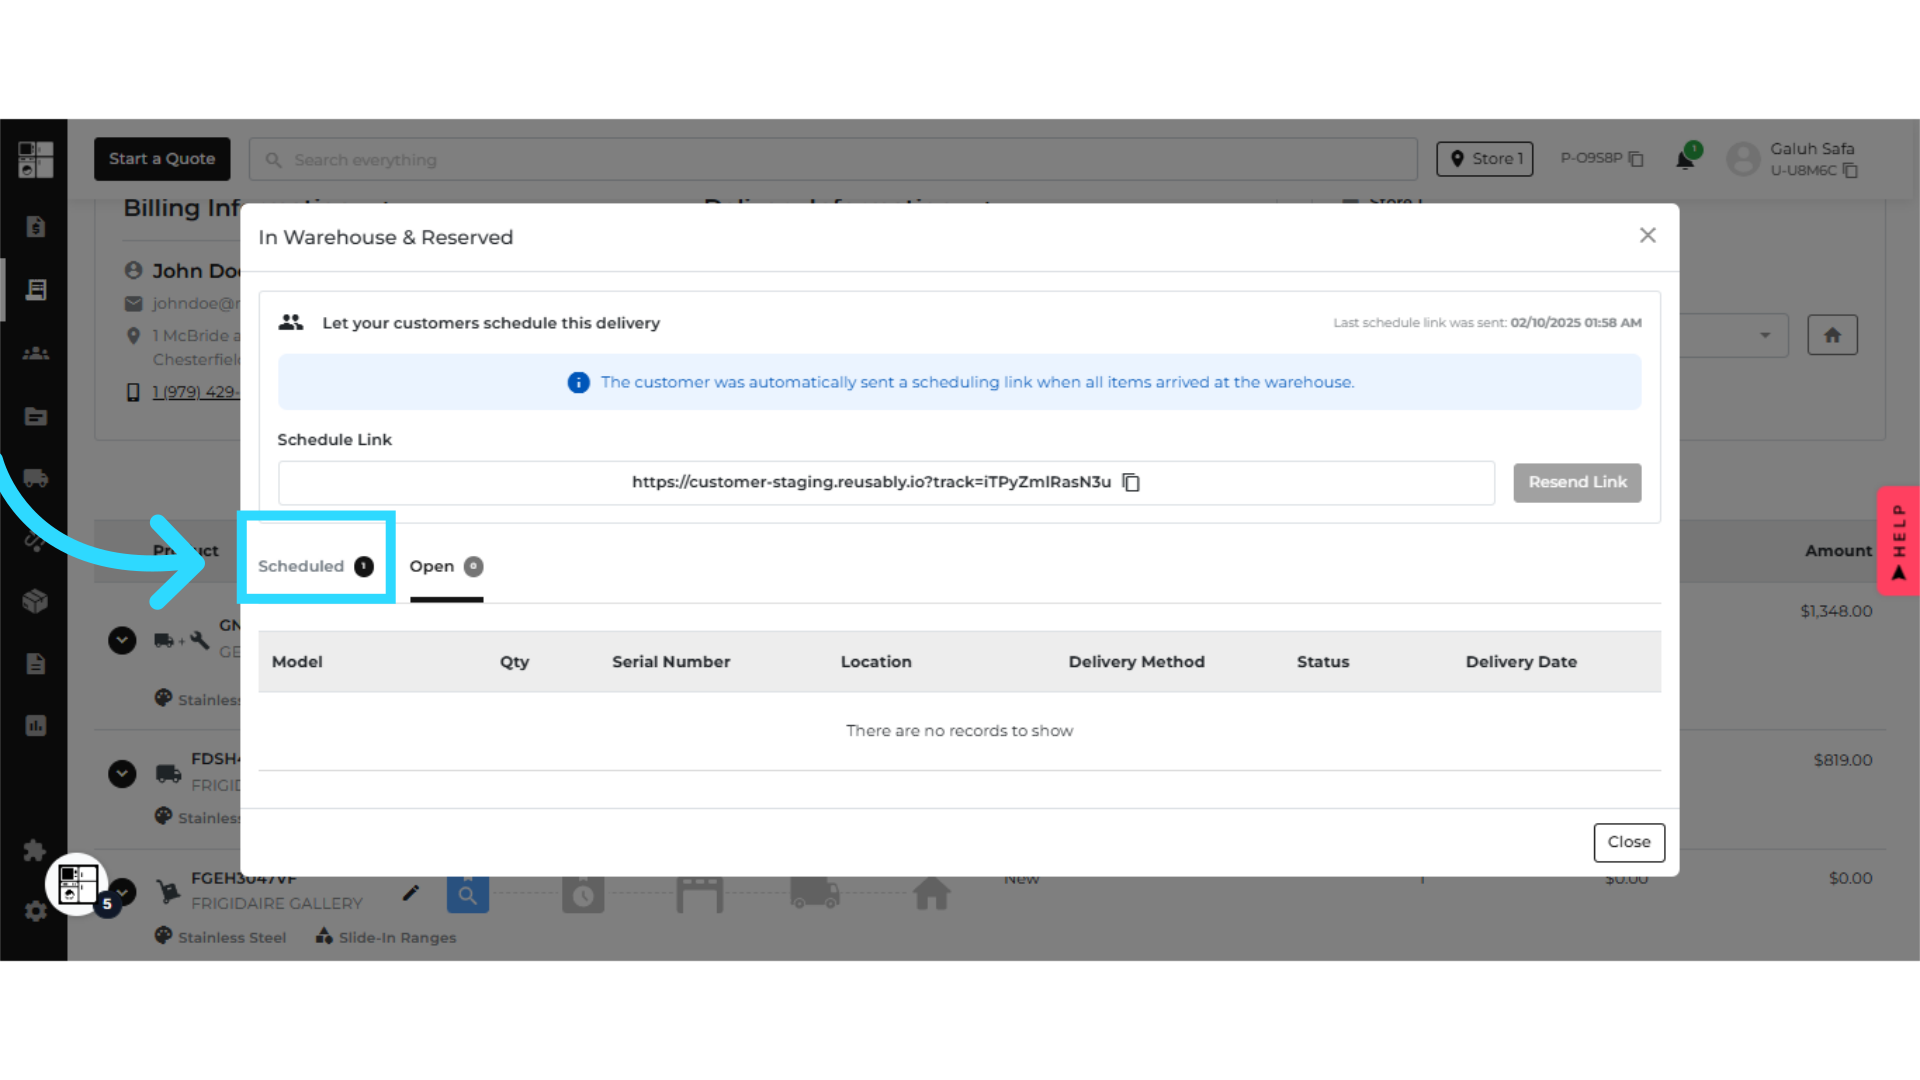
Next, notice that there are 2 tabs under the schedule link option, named "Scheduled" and "Open"

We are viewing the "Open", or un-scheduled items.

This is the quantity section,

and this is the serial number column. The serial number is not typically added until the item is scanned out from the warehouse.

And the reserved location.

However, if you need to add a serial number to an order for other reasons,

it can be done by clicking the +Add option here.


You can fill in the serial number,

and don't forget to save the data.

Under the delivery method,

select your delivery method from the drop-down arrow.

Next, select the calendar under the delivery date,

and select the date for delivery.

Updated!
See? how that item disappeared from our view?

That's because it lives over in the scheduled tab now!
When you go back to your order view,

now you will notice that there are letters under the warehouse icon.

This is the abbreviation for the delivery method where the item is reserved. When you see the icon with both the number below and the location abbreviation, your items are reserved and set for delivery. No additional actions are required. You are good!
Pro Tip!

Let's say you need to change the delivery date after an order has already been delivered and the stop is closed. You cannot do it from the order.

If you are a Superadmin, locate the order on the routing page and click the bottom bar. See Order Details.

Select "Edit the Order Details"!

See the delivery date at the bottom there?

Select the actual delivery date you want to be reflected,
and save your changes!

Well, let's see other delivery options!

Pickup Delivery Option

Let's go back to the order page, and see the pickup icon on the left.

Now, go ahead and open your delivery pop-up box by clicking on the reserved stock icon.

The delivery pop-up box will populate. You can simply click the down arrow in the status column.

Change the delivery status, from scheduled to delivered.

That’s it! Your package has gone from the scheduled page, and a notification pops up in the right corner—confirming the customer has successfully picked it up. Mission accomplished!

Updated!
Your order will move to the "house" icon which means it successfully picks up.

"Download" or "Print"
Here’s the good news – you can download or print your invoice in just a few simple clicks!

Customer Not Sure Delivery Option
Sometimes, your customer might not be sure about how they want to get their items. This is OK, but should be rare. Let's look at how we handle it.

If your customer is not sure,

just drop your fulfillment options with this arrow.

click "Change Fulfillment Type",

and choose the delivery option. Then just complete the order scheduling as you have learned!

Goodbye and happy ordering!
And that’s a wrap on our series about scheduling delivery on Appliance.io with different delivery options! Fast, easy, and headache-free. Thanks for watching, and we hope this guide was helpful! Feel free to reach out if you need any more help. Goodbye for now, and happy ordering!"